Web Client User Manual
The Hosted VideoWatch® Web Client is a web-based application for viewing video from your cameras that are connected to Datawatch Systems Hosted VideoWatch® service. No installation is needed to use the web client (it works on web browsers).
The Web Client works with the following browser versions:
- Google Chrome
- Microsoft Edge
- Mozilla Firefox
Internet Explorer is not a recommended browser for this web client.
The Web Client is best optimized for computer displays. To view optimally on your mobile phone, please use the Hosted VideoWatch® app. Click here for more information on the app.
*Note: Your saved Investigations or Views are dependent on using the same browser (an Investigation or View you make using Microsoft Edge may not be available if you login the next time using Google Chrome). Please make sure to use the same browser type.
1.0 ‘Cameras’ Tab
Once logged in, you will see a ‘Home’ screen under the ‘Cameras’ tab.

The ‘Home’ screen displays all cameras and various preset camera views (if any) associated with your account. From here you can select one of the preset views to see the associated cameras. Once is loaded, live video from each camera will stream to your screen.
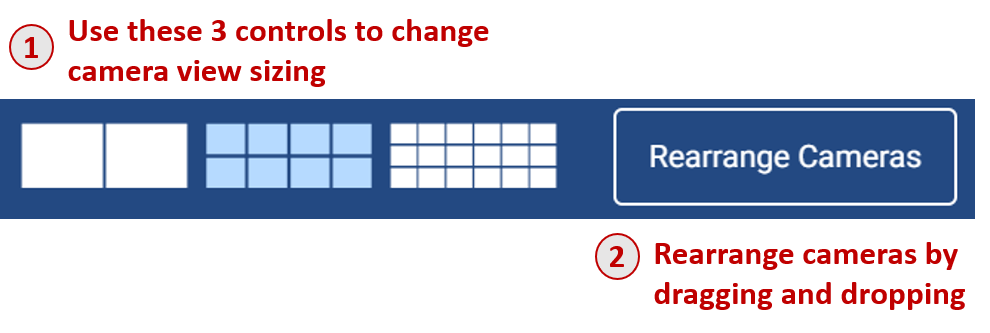
In the top-right menu bar, you will see:
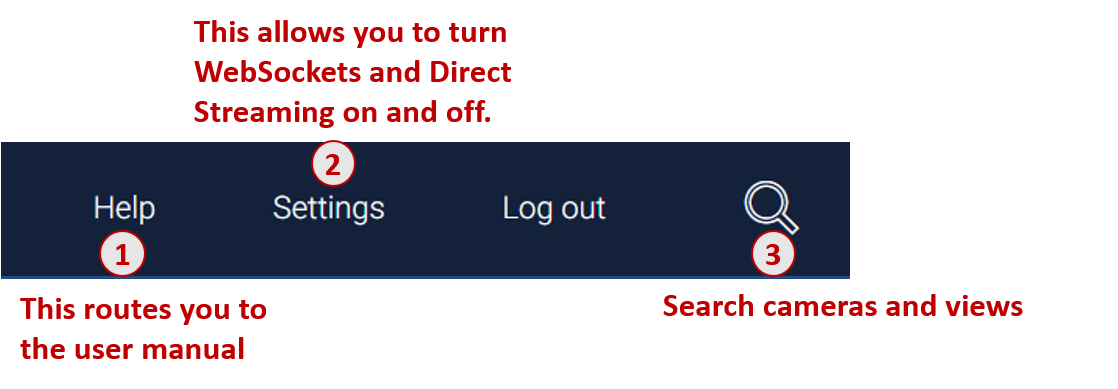
When you click on Settings, you will see:
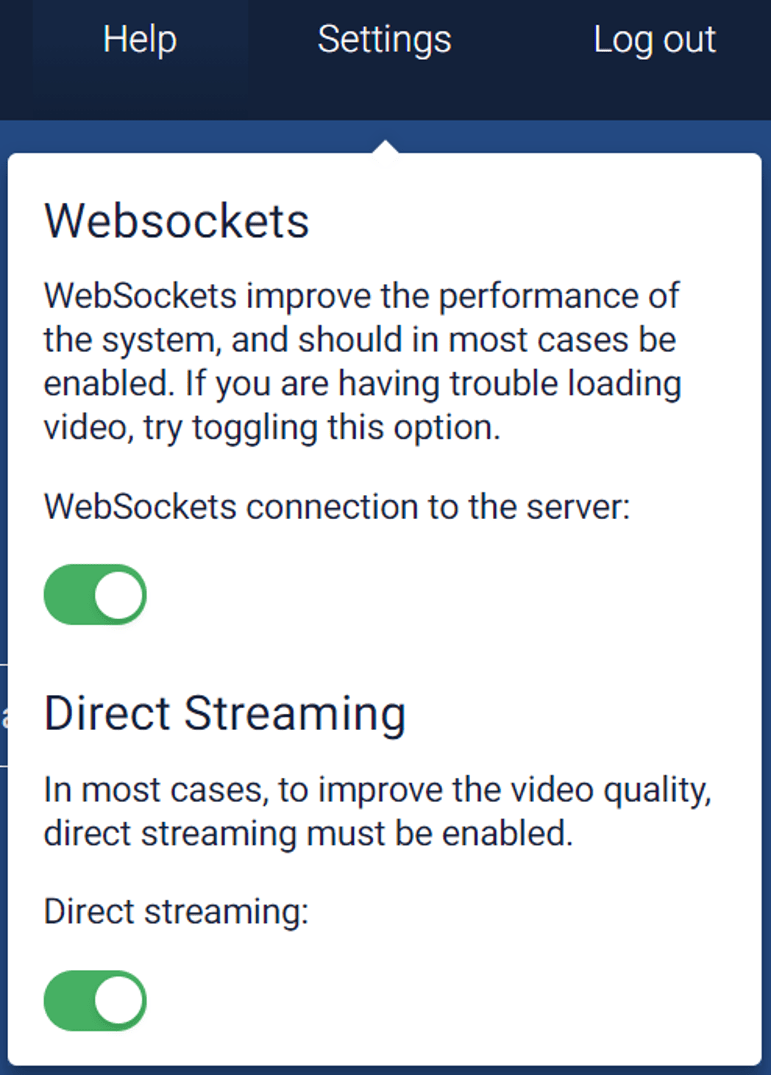
Click here for more information on Direct Streaming.
1.1 Single camera view
Click on an individual camera to view footage on a larger screen.
The other cameras in the preset view are viewable in a list of thumbnails on the right. To view one of the thumbnail camera views, click on it to make it the main feed. Note that in a single camera view, aspect ratio will match the source.
When you click on an individual camera, you will be viewing Live footage:
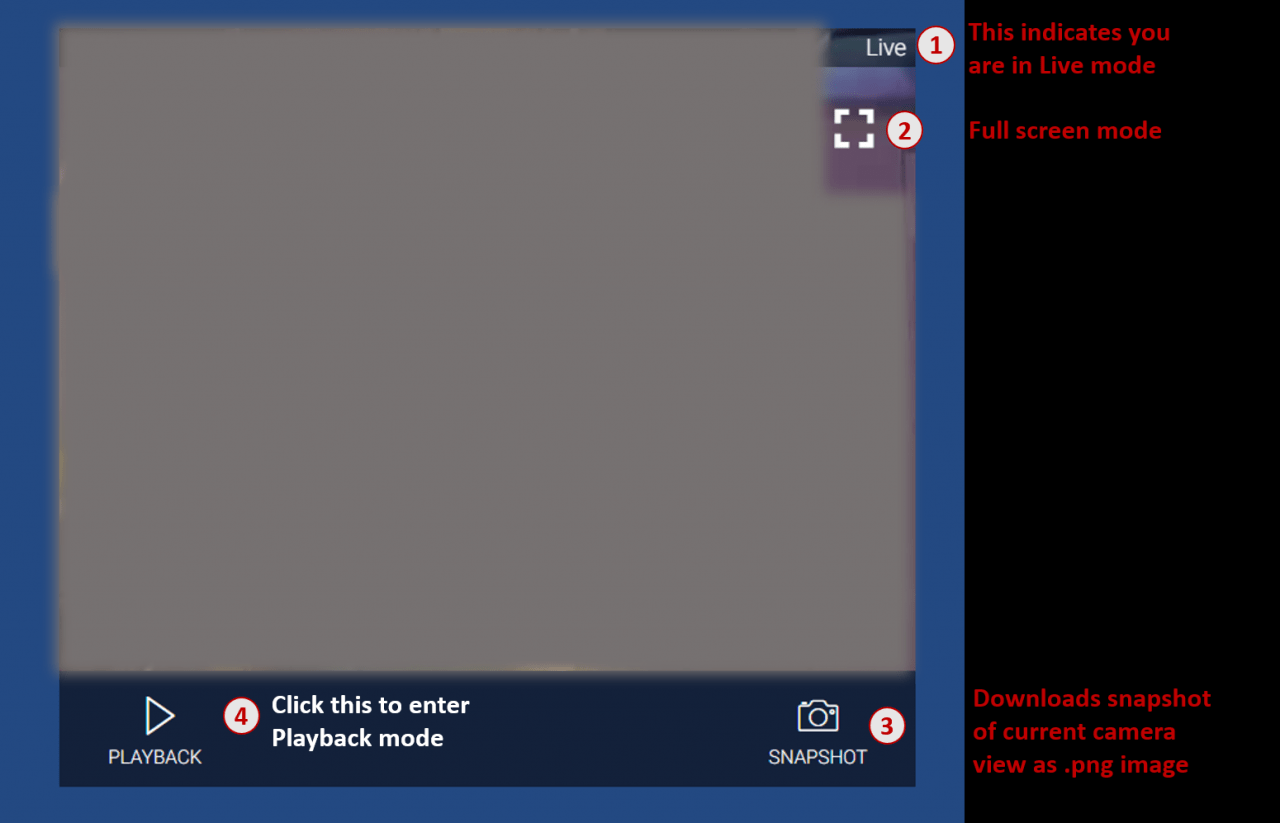
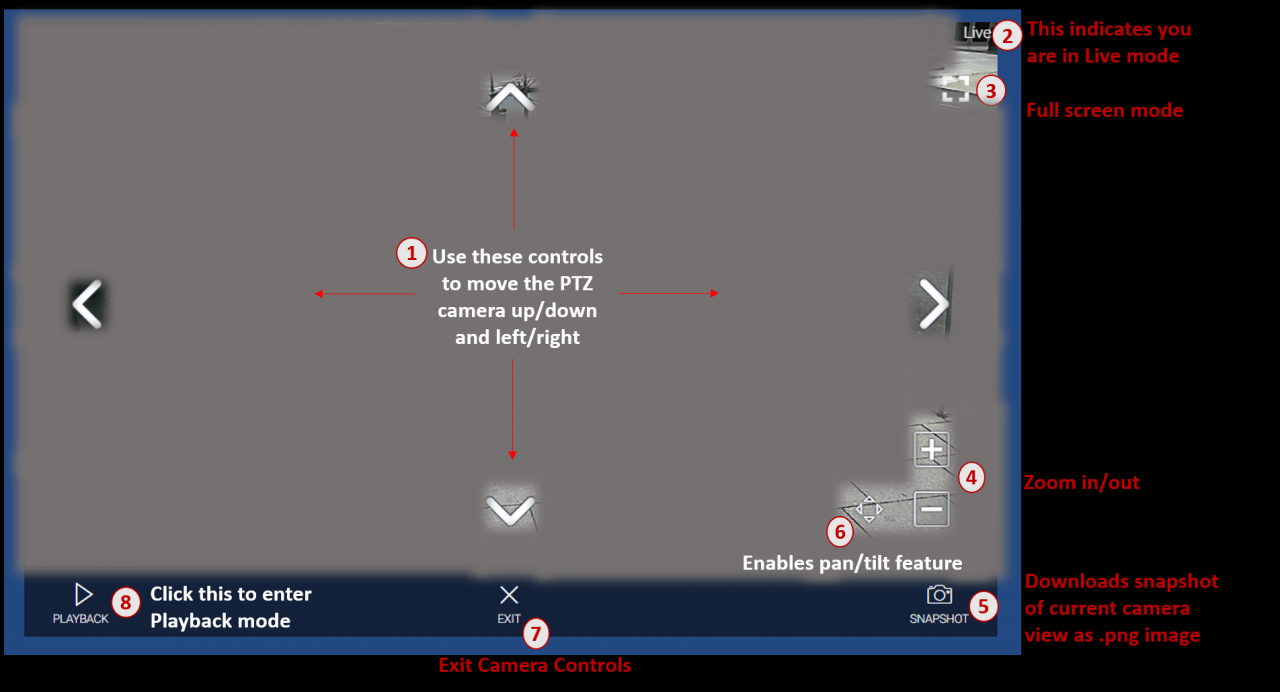
Note: If you have a PTZ camera, you will see an additional button named ‘Camera Controls.’

When you click ‘Camera Controls’ you will see:
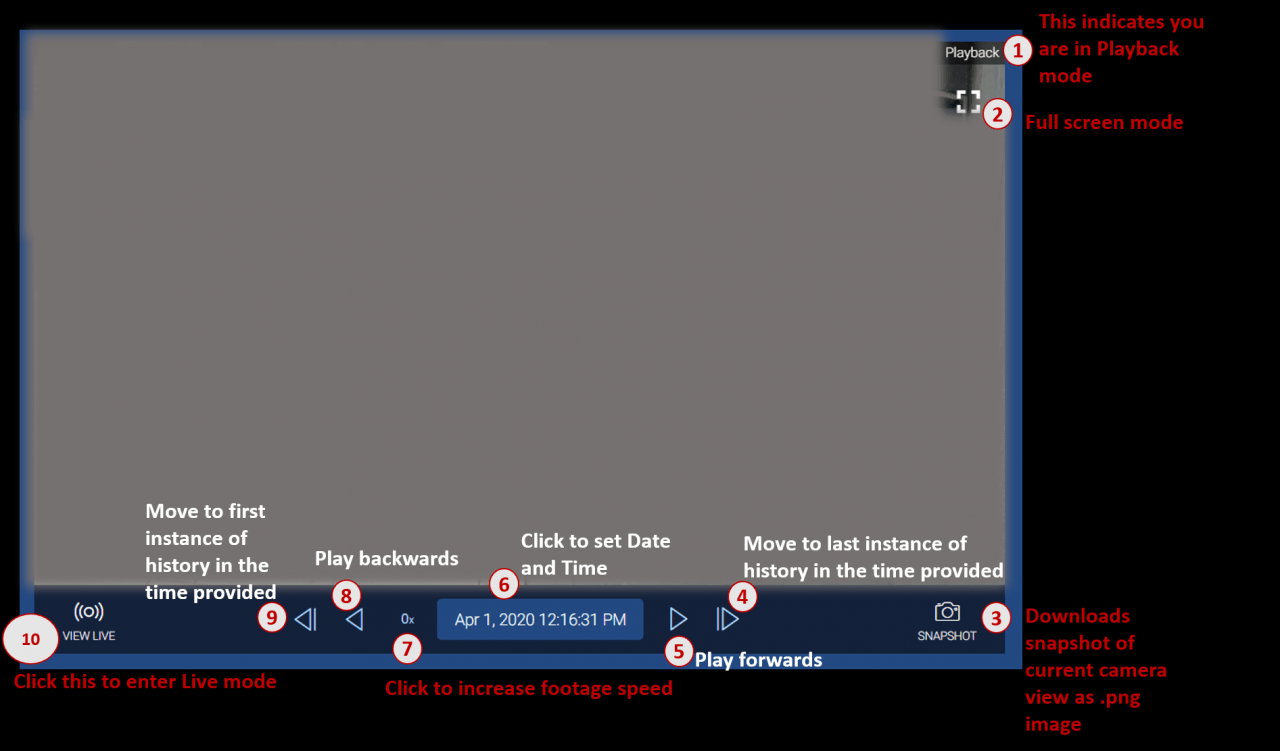
When in Playback mode:
2.0 ‘Investigations’ Tab
To investigate incidents and to prepare and download footage, please click on the ‘Investigations’ tab.

To create a new Investigation, click on:

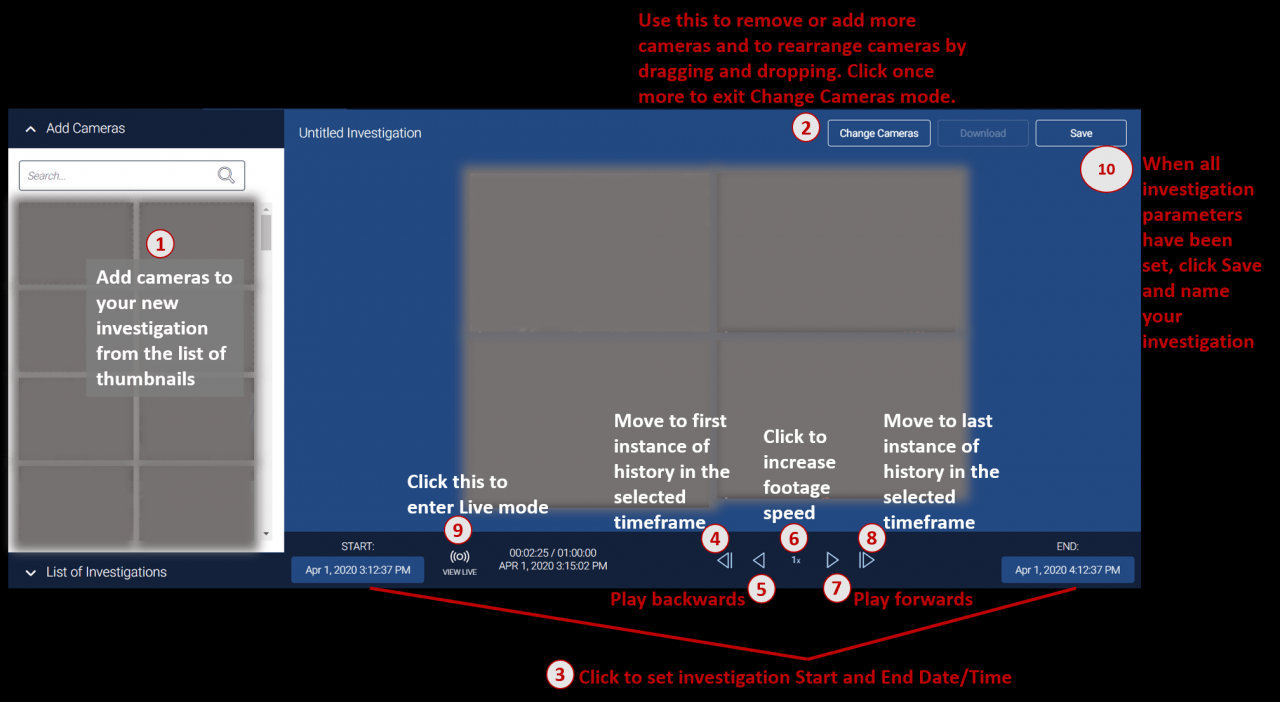
*Note: You will be able to add a maximum of four cameras to a single Investigation.
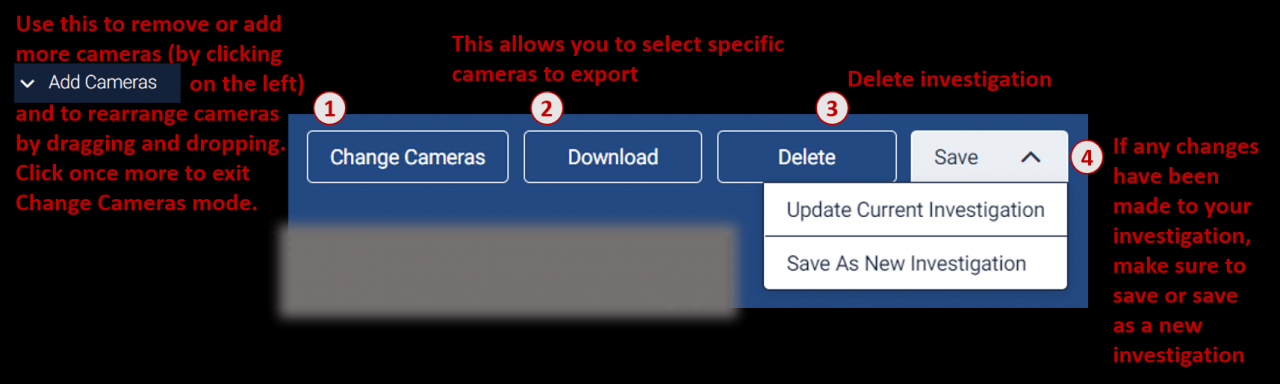
In your saved Investigation, you will see these controls in the upper right corner:
2.1 Downloading Footage
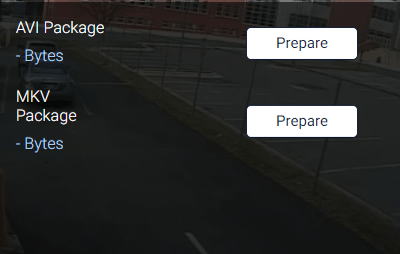
- After clicking ‘Download,’ select which camera(s) you wish to download footage from by clicking ‘Prepare:
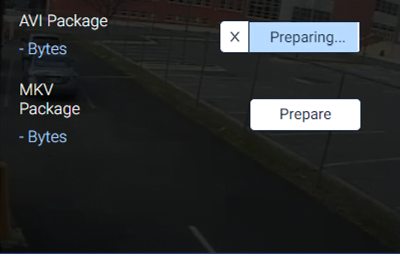
- The status of ‘Prepare’ will change (it may change from ‘Requesting’ to ‘Queued’ to ‘Preparing’):
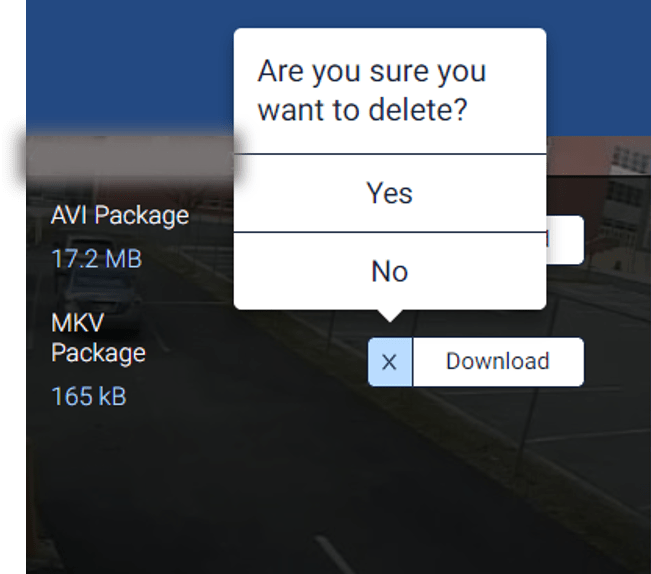
- Once the ‘Prepare’ status is complete, the button will change to ‘Download.’ Click this to begin downloading.

- If you do not wish to download footage you have already prepared, click the ‘x’ to delete prepared footage:
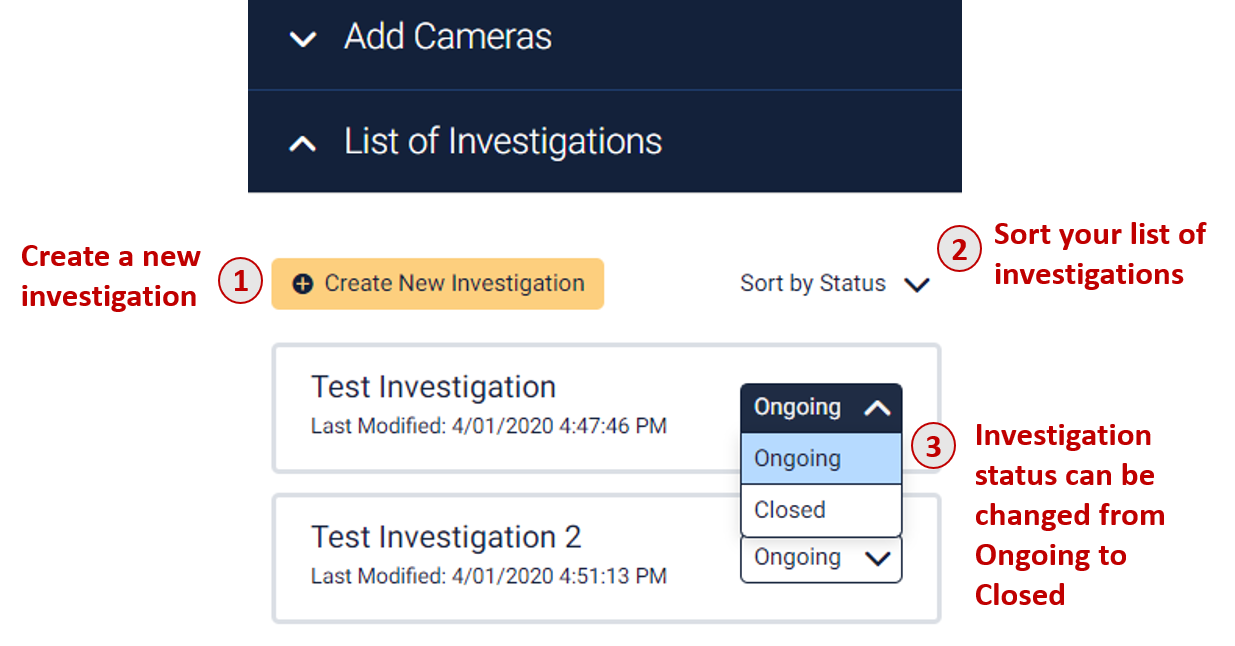
2.2 Accessing Saved Investigations
To access your saved Investigations, click on ‘List of Investigations.”
3.0 ‘Views’ Tab
To create custom views, please click on the ‘Views’ tab.

To create a new View, click on:

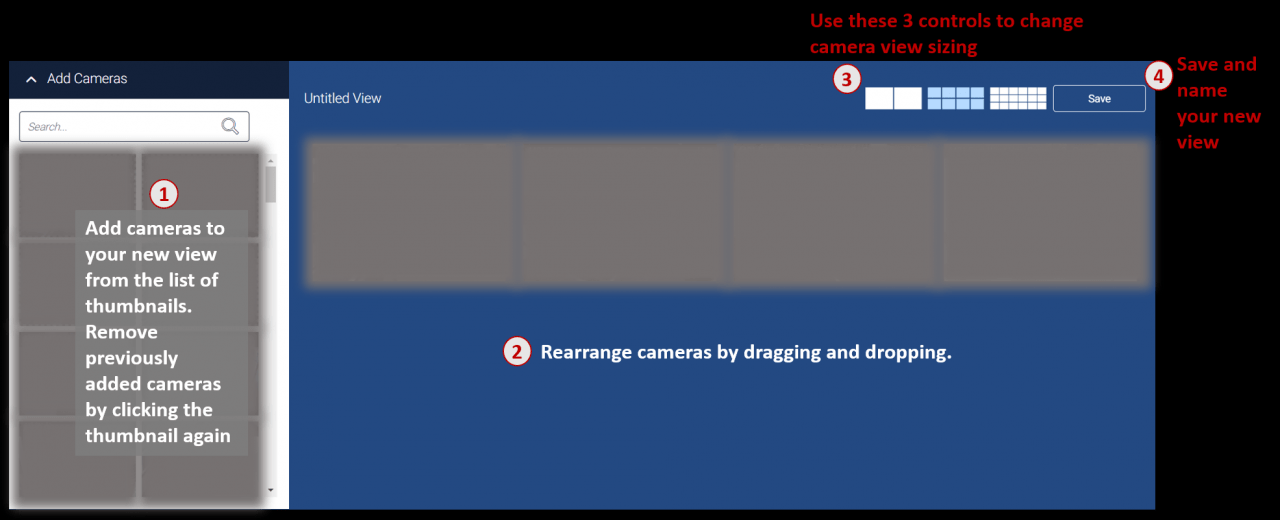
In your saved View, you will see these controls in the upper right corner:

3.1 Accessing Saved Views
To access your saved Views, click on ‘List of Views.’
